JimBobs....tools

MOBILEMERCMAN

Founding Member / Competitor
Alright lets see them. Many people make or modify tools for a particular job. Here are some simply ones.

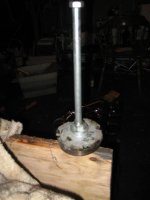
If you sat on a stool and used these for a couple hours what were you doing?
I used to do it pretty regular. Not so much any more.

DSC00100.jpg

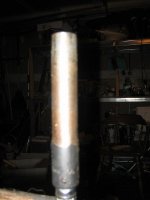
These are helpful at times. I use the Outboard one more.

DSC00102.jpg

This I grab nearly every day.

DSC00104.jpg
 
The top pics looks like the tools used to remove the upper swivel pin, knock the nut around after you drill those awful holes in the transom plate, swappng the gimbal ring.

The second looks like a wire harness used to run a fully rigged motor on the floor or test stand.

...third pic, I'm at a loss.:ack2:

Kurt
 
Last edited:
2nd pic - compression test on an outboard, spark board test, etc...????

And the female part has power, ground, start, and switched power..... but the brain hasn't figured out what exactly for....

dying to know - someone with your experience may make some of my diag time shorter!!!
 
Third one to possibly go between cavitation plate and prop holding prop from turning to remove prop nut?????
 
The top pics looks like the tools used to remove the upper swivel pin, knock the nut around after you drill those awful holes in the transom plate, swappng the gimbal ring.

The second looks like a wire harness used to run a fully rigged motor on the floor or test stand.

...third pic, I'm at a loss.:ack2:

Kurt

Yes Biggus you are correct on the 1st and second. I also use the outboard harness for trouble shooting.

Third one to possibly go between cavitation plate and prop holding prop from turning to remove prop nut?????

Time warp is also correct. It works out to be a great prop block. It is a cutoff scrap of star board I found at Fountain. I have been using it as is for about 10 years.


Anybody else have something to share?

:)
 
I got some good ones at work. No pics though. Maybe when i get back to work after my 16 days of vacation!!
 
Hey MOBILEMERCMAN, I gotta use those tools to try to bring up my gimbal ring. The holes are already drilled on the sides of the transom plate. Any tips you can give me? What is the bolt with the nut and is that used?
 
Hey MOBILEMERCMAN, I gotta use those tools to try to bring up my gimbal ring. The holes are already drilled on the sides of the transom plate. Any tips you can give me? What is the bolt with the nut and is that used?

The bolt is for the plug that fills the hole. I didn't have a 5/8 allen.

First tip is be patient. Take the time to grind a chisel to the right angle so you can get good contact on the nut. One of mine is sharper for the original nut that doesn't have the notch cut. The others are more like a flat punch for the notched nut.

Ok, The nut on mine has no notch. I made up a center punch type punch but I guess I need a chisel type also. I have to loosen the nut/bolt on the steering tiller also, correct?
 
Yes, loosen the tiller arm bolt. The chisel needs to reach from edge to edge on the nut. You should first hit it to create a ridge. Then turn the ring so you can then turn the nut. Once you work around and have a chisel line on each surface it begins to go faster. Also once you find a good angle move the ring as you turn the nut so you keep the good angle to strike your groove.

How far has yours dropped?

Mine has dropped somewhere between 1/8-3/16 of a inch. When you say edge to edge you mean from corner to corner on nut and I kinda drew up this picture. hold the chisel like the upper chisel or the lower chisel to the nut.
 

Attachments

  • Untitled.jpg
    Untitled.jpg
    4.9 KB · Views: 3
That has dropped a bunch. Did you measure it at the top of the ring or the space at the lower pivot.

First things first. I have found success making a vertical groove [chisel mark] near the corner of the nut. You don't want to actually hit the corner you will end up with a rounded off mess. Create a groove just in from the edge.

Second thought. I feel I must also share. The rings can also drop due to corrosion between the steel upper swivel shaft and the aluminum ring. I have found in most cases when the ring drops the ring is worn. Unless it has external steering. I suggest you also check to see if the seal is laying on the top of the gimble ring.

Keep me posted. I hope it will tighten up for you. The spec is something like .002 to .010 measured at the lower pivot between top of ring and the upper pin holding ear, boss what ever it is called.
 
Gimbal bearing installation tool.
Shift Cable installation tool
Alpha shift cable removal socket.
 

Attachments

  • bearing tool 1.jpg
    bearing tool 1.jpg
    40.4 KB · Views: 5
  • Tools%20009%20%28Large%29.jpg
    Tools%20009%20%28Large%29.jpg
    128.4 KB · Views: 8
  • Tools%20013%20%28Large%29.jpg
    Tools%20013%20%28Large%29.jpg
    49.7 KB · Views: 4
Back
Top